Invite your Team
Invite Your Teammates
- From your workspace home screen, select your workspace name in the top left corner. If you’re viewing a project, you can go back to your workspace home screen by clicking the home button (Multiplayer logo in the top left corner).
- Click “Workspace Settings”
- Click “Members”
- You can waitlist a specific domain name by clicking “Add domain”. We will send you an email with a 4-digit code to validate the domain.
- You can individually invite collaborators by clicking “Invite people” and entering their email address

User Permissions
You have to explicitly select the projects your workspace users can access. Giving workspace access is not sufficient for users to have visibility to your projects.
Per workspace, you can set these permissions:
| Permission | Actions |
|---|---|
| Owner | All admin permissions plus the ability to manage billing |
| Admin | All member permissions plus the ability to manage users, teams, projects and integrations |
| Member | Read / write permissions to the projects they have access to |
| View only | Read-only permissions in projects that they have access to |
Per project, you can set these permissions:
| Permission | Actions |
|---|---|
| Admin | Manage access to the project |
| Member | Read / write permissions to the project |
| View Only | Read-only permissions to the project |
To edit user permissions:
- From your workspace home screen, select your workspace name in the top left corner. If you’re viewing a project, you can go back to your workspace home screen by clicking the home button (Multiplayer logo in the top left corner).
- Click “Workspace Settings”
- Click “Members”
- Click the ellipsis button “…” next to a user
- Select the desired permission level
Remove Teammates
- From your workspace home screen, select your workspace name in the top left corner. If you’re viewing a project, you can go back to your workspace home screen by clicking the home button (Multiplayer logo in the top left corner).
- Click “Workspace Settings”
- Click “Members”
- Click the ellipsis button “…” next to a user
- Select “Remove member”
Teams
Create a Team
A team allows you to group together multiple users and easily manage their permissions and access.
- From your workspace home screen, select your workspace name in the top left corner. If you’re viewing a project, you can go back to your workspace home screen by clicking the home button (Multiplayer logo in the top left corner).
- Click “Workspace Settings”
- Scroll to the bottom of the left panel
- Click “+ Create a new team”
- Enter your team name and (optionally) a custom logo
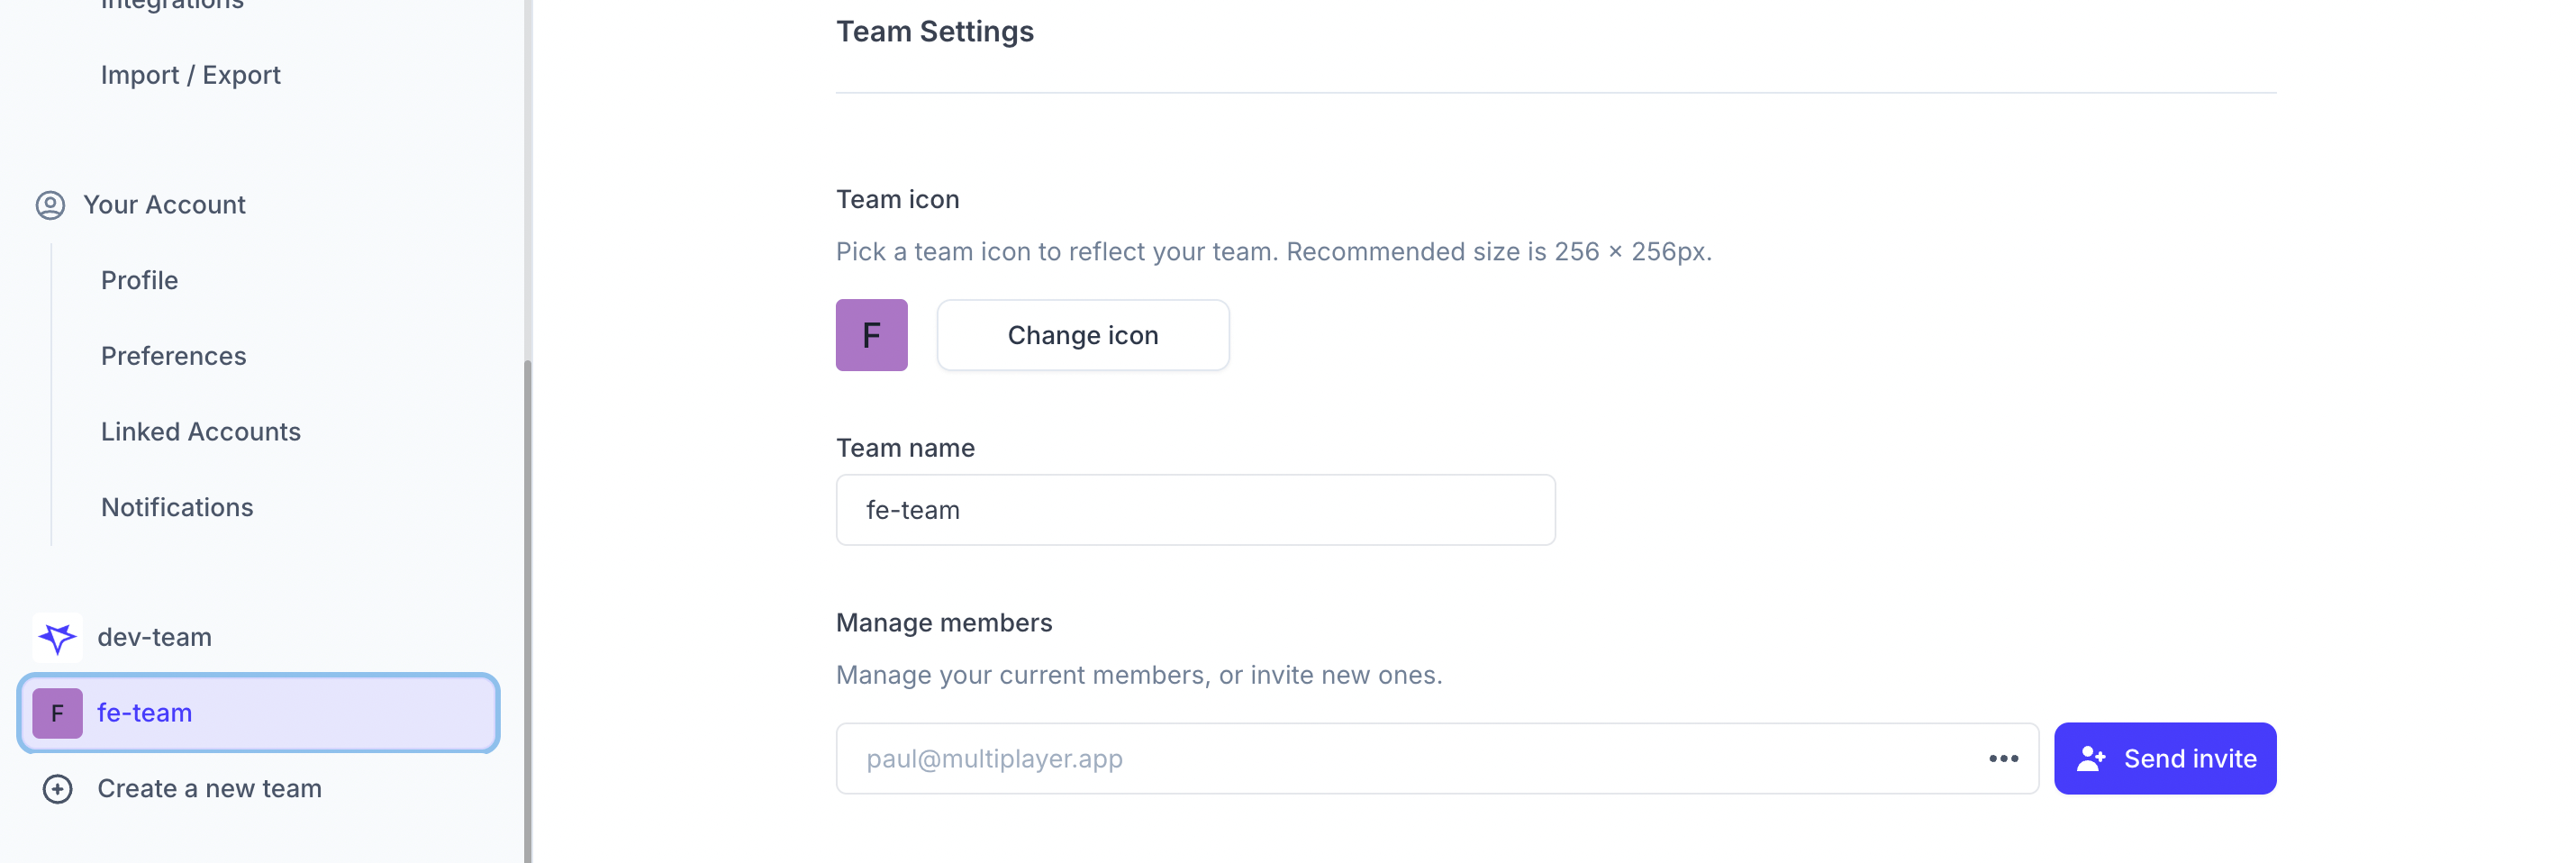
Edit a Team
- From your workspace home screen, select your workspace name in the top left corner. If you’re viewing a project, you can go back to your workspace home screen by clicking the home button (Multiplayer logo in the top left corner).
- Click “Workspace Settings”
- Scroll to the bottom of the left panel
- Select the team you wish to edit
- You can edit the team logo, edit the team name, and manage its members
Delete a Team
- From your workspace home screen, select your workspace name in the top left corner. If you’re viewing a project, you can go back to your workspace home screen by clicking the home button (Multiplayer logo in the top left corner).
- Click “Workspace Settings”
- Scroll to the bottom of the left panel
- Select the team you wish to delete
- Scroll down and click “Delete team”
Adding Comments to your Project
You can add comments to the following elements:
- Full-stack session recordings: Open a session recording > Click on "Session Information" (first icon in top nav menu) > Comments tab
- Notebooks: Open a Notebook > Click on "Comments" (icon in the top nav menu) > Comments sidepanel
Next Steps
You did it! What’s next?
- Integrate with your favorite AI coding tool using our MCP server
- Build, test, and debug API integrations with ease
- Capture a full-stack session recording
📌 If you have any questions shoot us an email! 💜