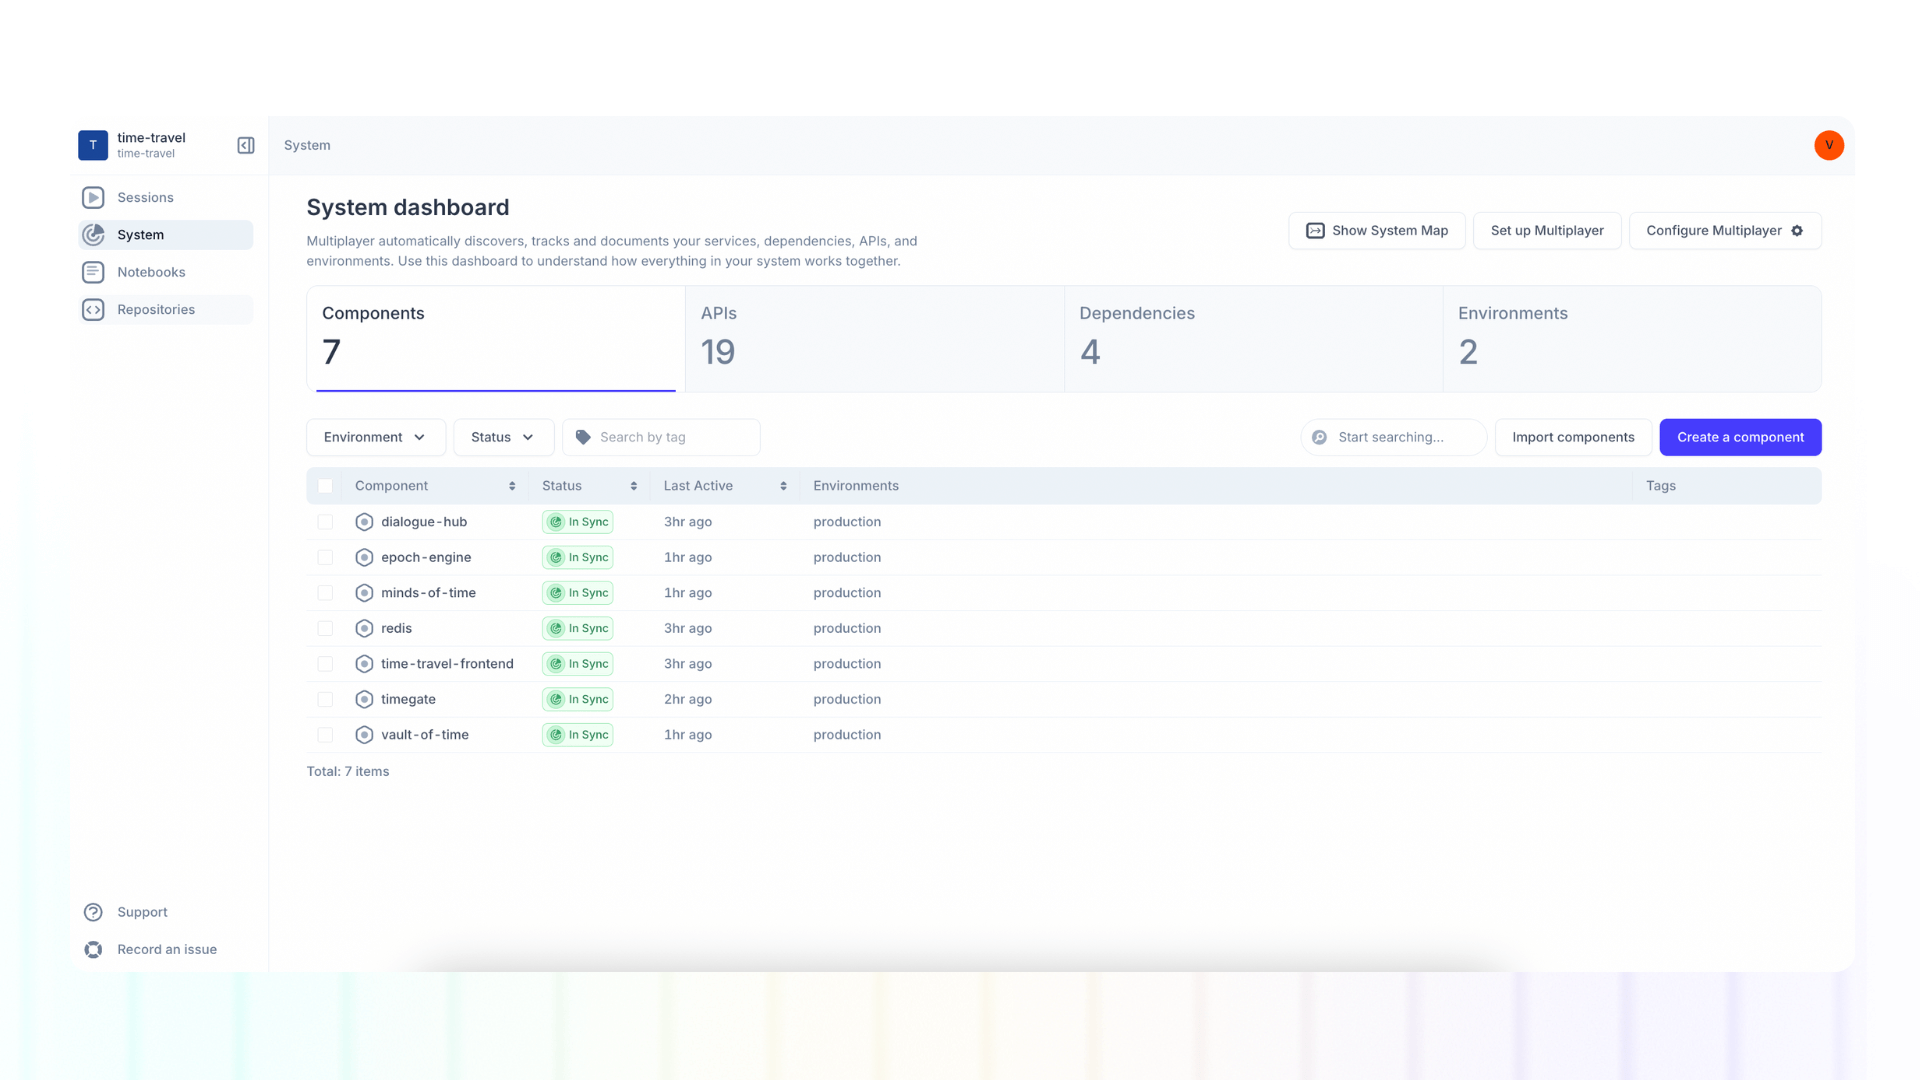
System table view
The system dashboard shows by default a table view of all the components, APIs, dependencies, and environments within your system.
Multiplayer automatically generates a real-time, accurate, and always-up-to-date system overview, so you never have to worry about holistically understanding your system (or manually updating architecture documentation).
Dashboard statuses
When the Multiplayer full stack session recordings are fully configured, the system dashboard will display a status next to each component, API, and dependency.
- 🟢 In Sync = There is full sync between your Multiplayer project and the information automatically detected within your live system about your components, APIs, or dependecies.
- ⬜️ Documented = The component exists in your Multiplayer project, but it has not been detected in your live system.
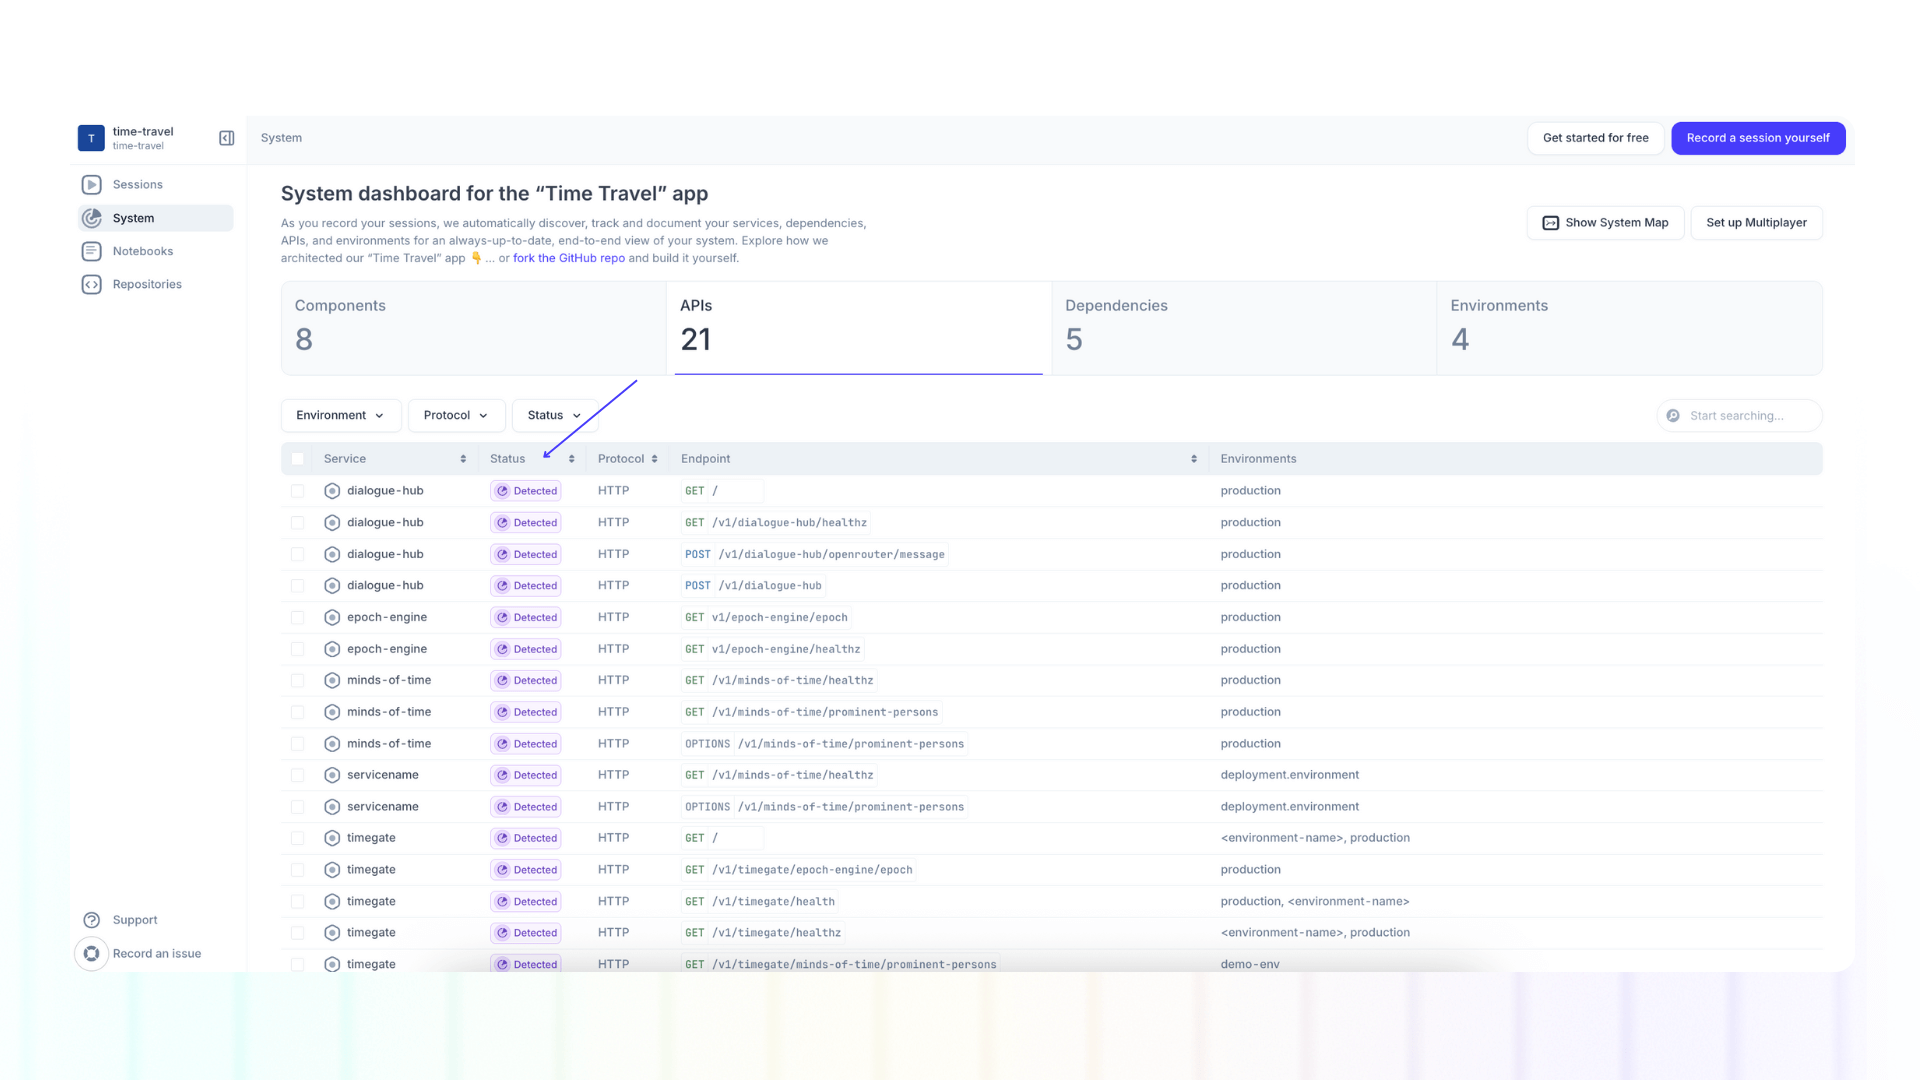
- 🟣 Detected = The component has been detected in your live system, but has not yet been added to your Multiplayer project.
A discrepancy between your live system and Multiplayer can happen, for example, when you manually add components in your Multiplayer project (e.g. when clicking "Import components" or "Create a component") that do not yet exist in your software system.
Alternatively, it's possible that those components exist in your system under a different name. To prevent naming confusion, you can add multiple aliases to components or merge components in the system dashboard.
View component information
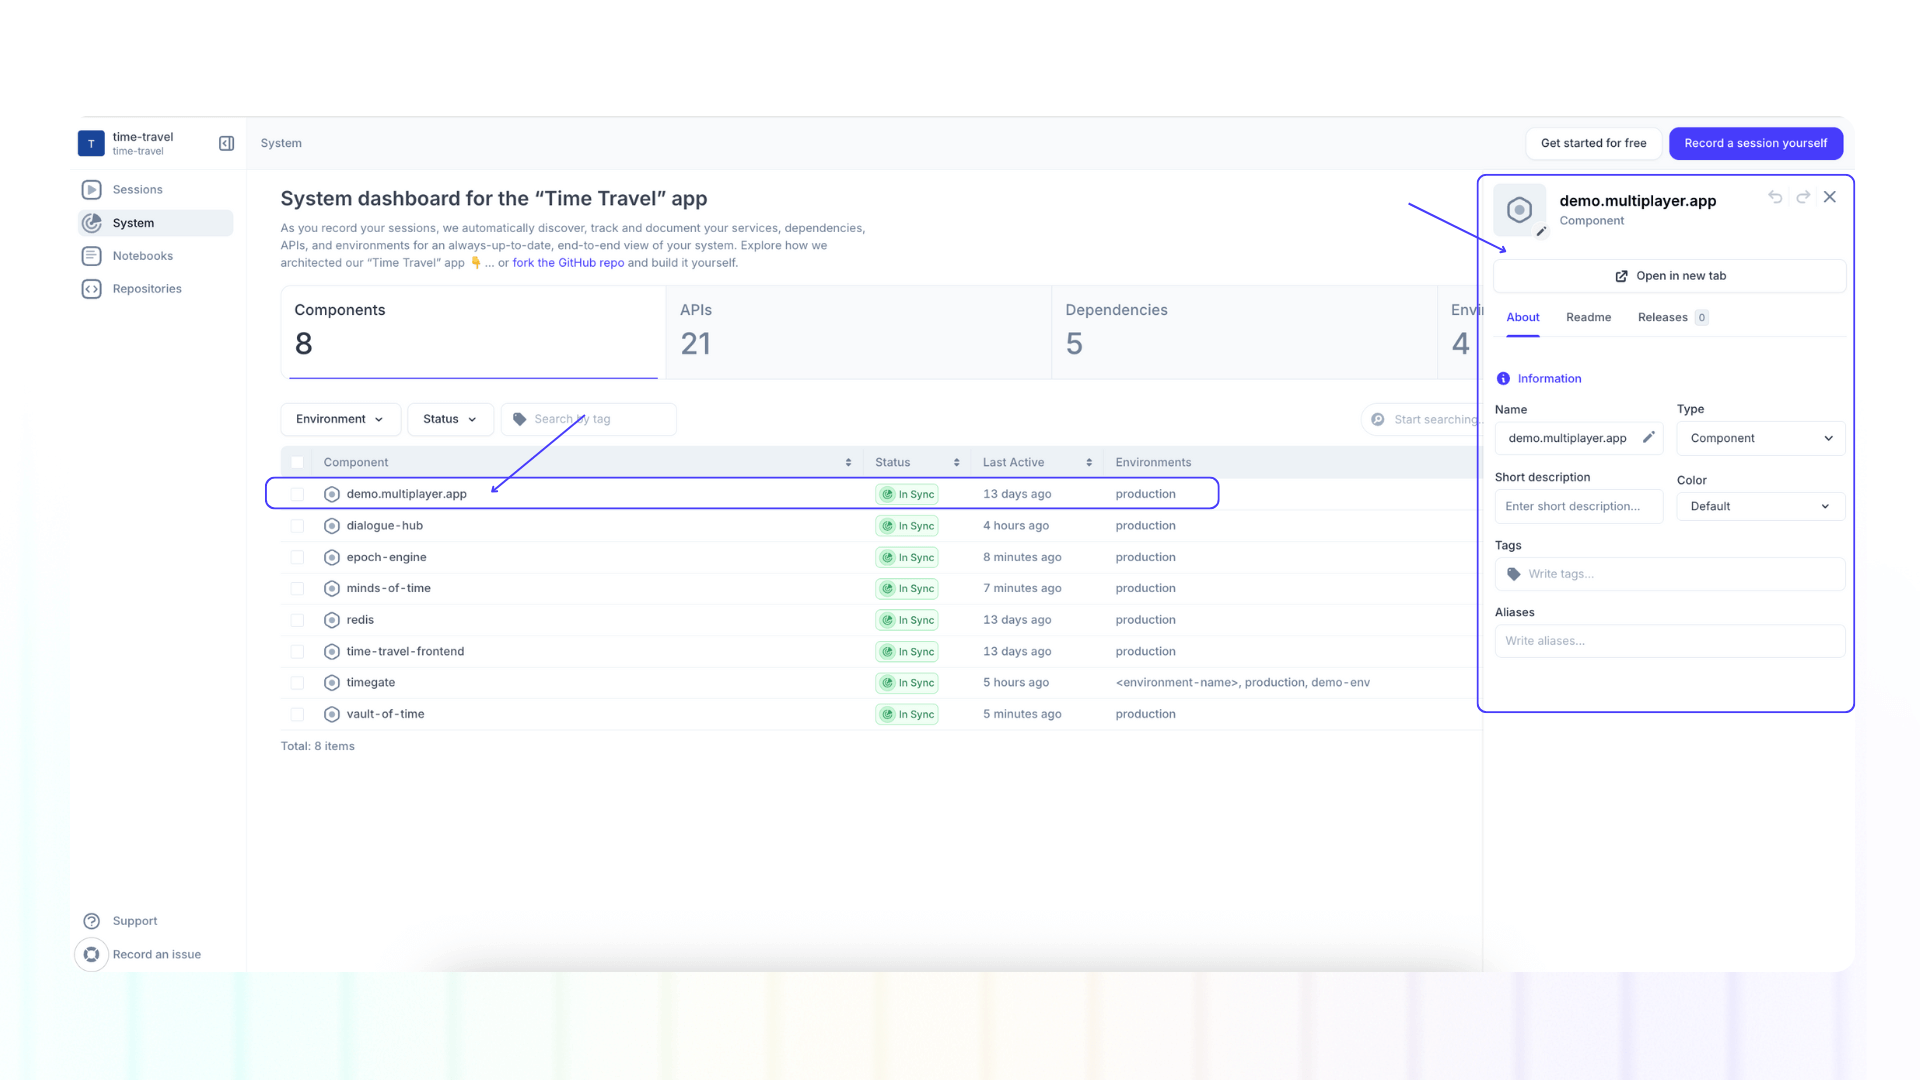
We define a component as a software that uses or provides an API (e.g. web-apps, microservices, SaaS providers, etc.).
Double clicking on each line item in "Components" will open a side panel with additional information about that item.
By clicking on the pencil icon over the component icon, you can upload an new image or select one from our library.
In the component information side panel you will also find three tabs:
- About: edit the component name, type, description, color, tags and aliases
- Readme: write a readme using all the blocks available in notebooks
- Releases: automatic list of releases when you connect your Git repos
ℹ️ Please note that this is the same information that would appear when reviewing component information in the system map, and any changes to will automatically propage to there too.
ℹ️ Please note that double clicking on line items is not currently enabled for APIs and dependencies.
Add components
There are two ways to add a new component while in the system table view:
- Click "Import components” in the "Components" tab
- In the pop up modal select a CSV file from your computer (you can first download and fill our template, if needed)
- Click "Create a component” in the "Components" tab
Merge duplicate components in the system dashboard

We detect all components in your system based on name.
If your project uses specific naming conventions (e.g. environment-specific naming such as api-service-production and api-service-staging) this can result in duplicate entries that clutter your system dashboard.
You can merge these components into a single, canonical component and automatically assign the original names as aliases.
For example:
- Merge
api-service-productionandapi-service-stagingintoapi-service - The result is one clean component (
api-service) with the original names preserved as aliases
How to use it:
- Go to system dashboard → Components tab
- Select the components you want to merge
- Click Merge
- In the merge window, name your canonical component. Aliases will be applied automatically for the names of the merged components.
- Click "Confirm Merge" to apply changes
Filtering results
Filtering options vary per tab.
"Components" tab filter options:
- Environment
- Status
- Tag
"API" tab filter options:
- Environment
- Protocol (HTTP, Messaging, RPC)
- Status
"Dependencies" tab filter options:
- Source
- Target
- Protocol (HTTP, Messaging, RPC)
- Status
"Environments" tab filter options:
- Tag
Next steps
👀 If this is the first time you’ve heard about us, you may want to see full stack session recordings in action. You can do that in our free sandbox: sandbox.multiplayer.app
🚀 If you’re ready to trial Multiplayer with your own app, you can follow the Multiplayer configuration steps. You can start a free plan at any time: go.multiplayer.app
📌 If you have any questions shoot us an email! 💜