System map
With the system map you can immediately understand how all the pieces in your system fit together. Multiplayer automatically generates a real-time, accurate, and always-up-to-date system architecture diagram, so you never have to worry about easily visualizing your system (or manually drawing a diagram).
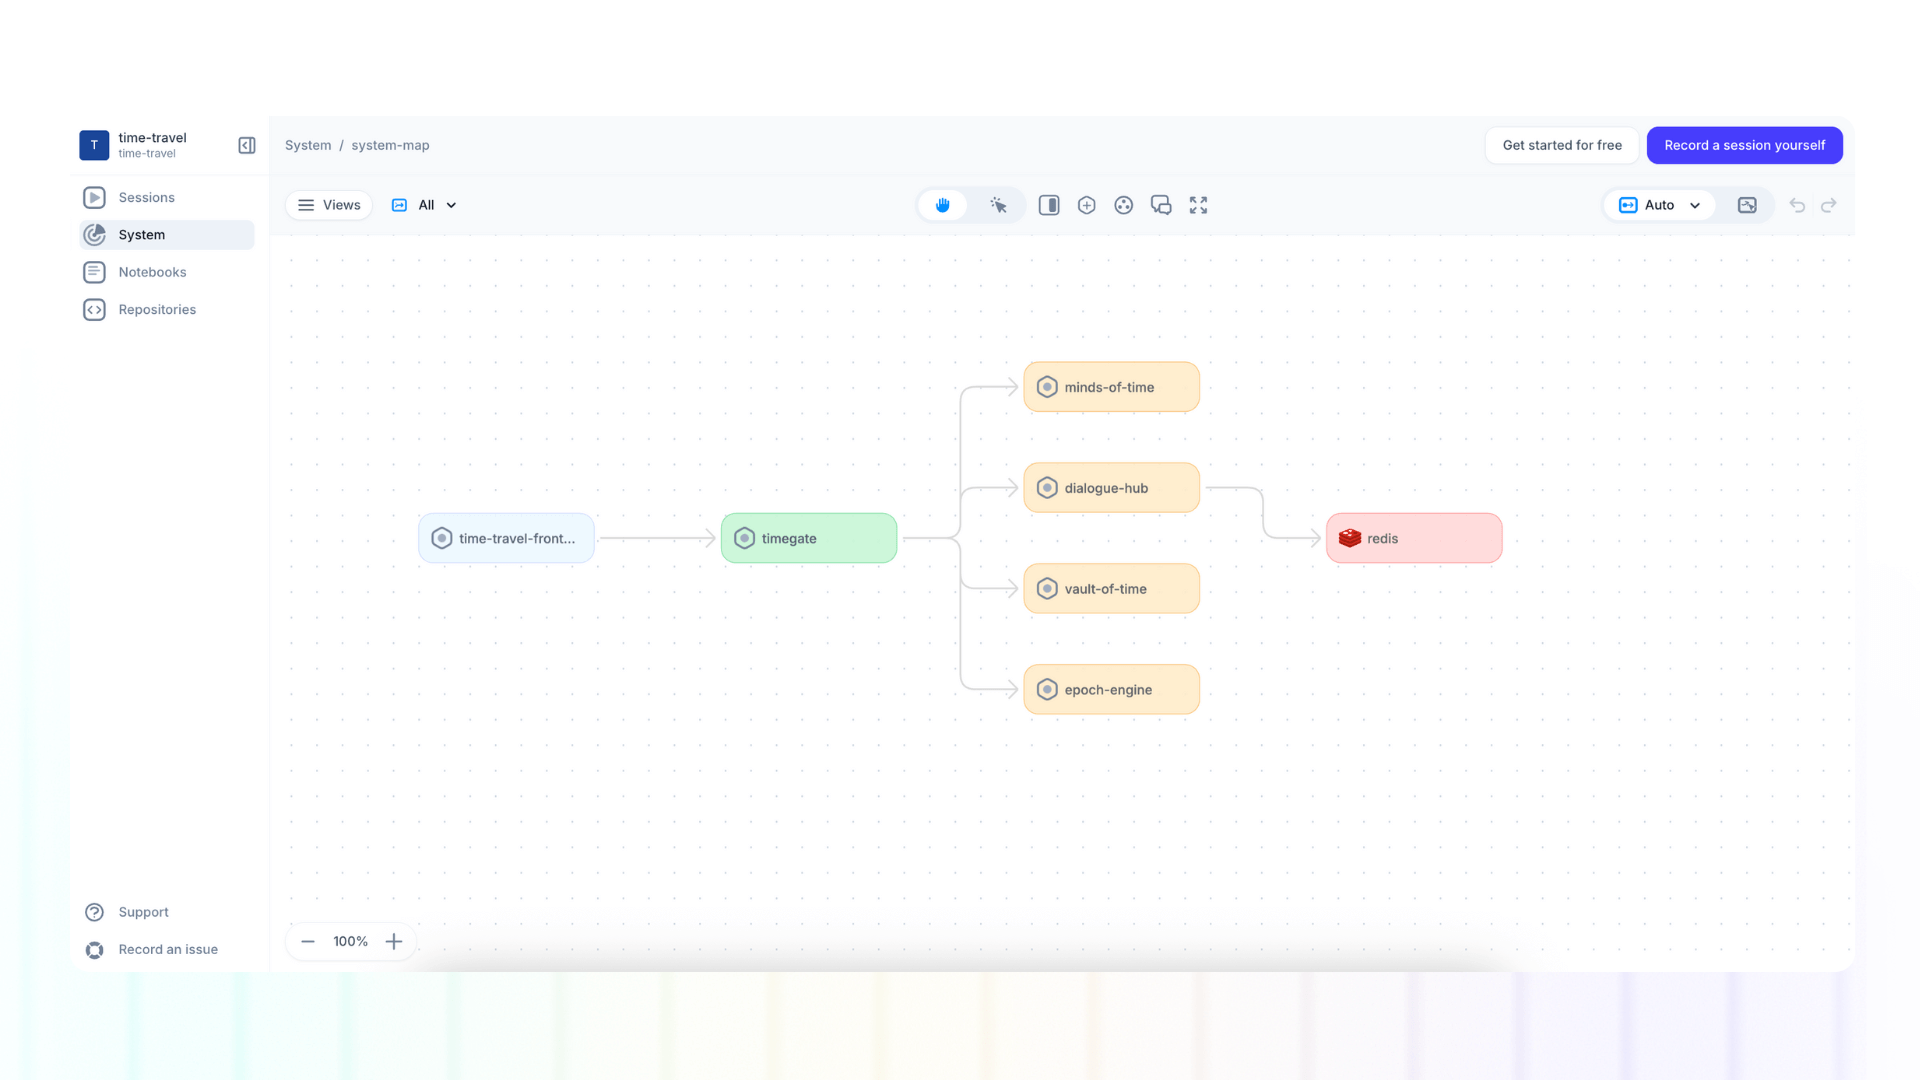
Top navigation overview

Left:
- Views Panel: Create a list of filtered components of your system map.
Center:
- Hand tool: Hold and move the map canvas
- Select tool: Select, move, and edit individual components
- Open system map information: Review and edit the system map name, description, tags, readme, and comments.
- Add component: Add a component to your system map by selecting an existing component listed or by creating a new one.
- Add Group: Group components together for a cleaner, less cluttered diagram.
- Comments: Add a comment for your team about this Platform.
- Enter Fullscreen
Right:
- Auto / Manual layout: Change the layout of your platform.
- Undo/Redo
Edit components and dependencies
View component information
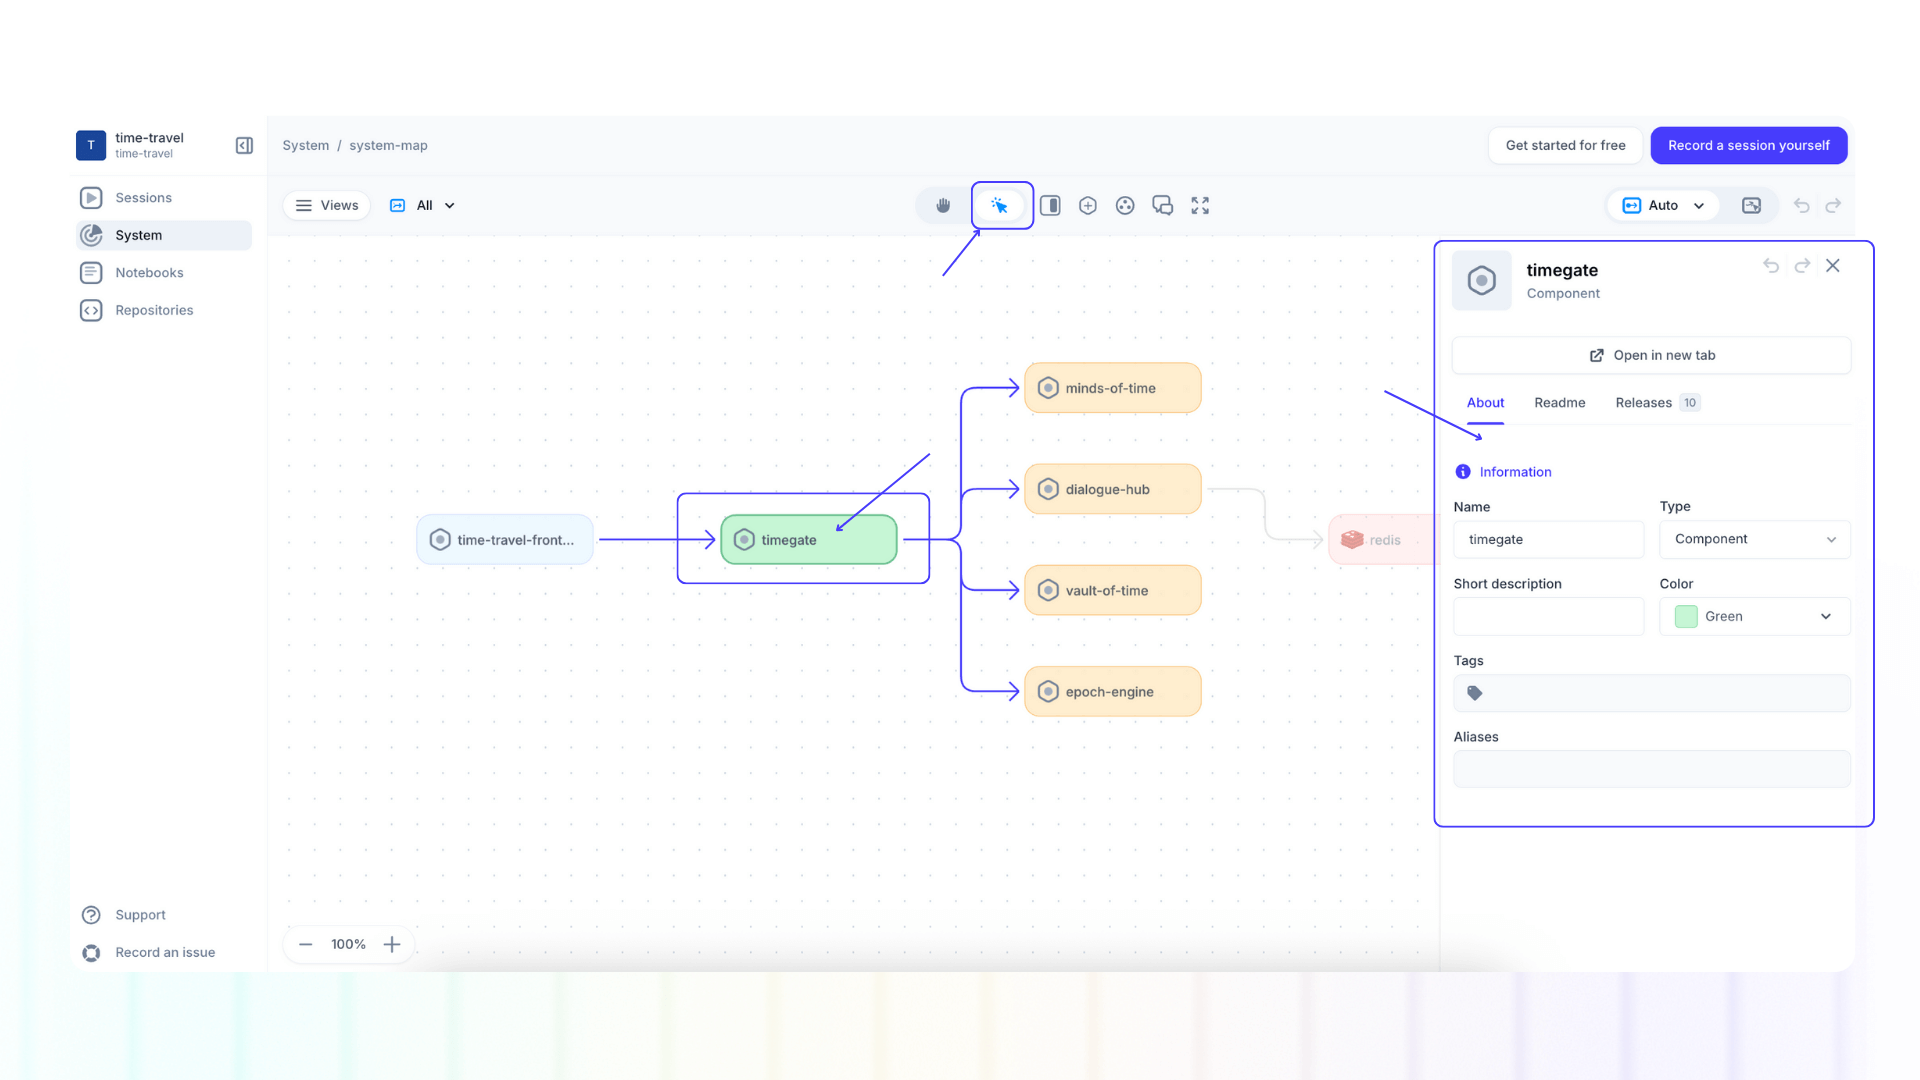
We define a component as a software that uses or provides an API (e.g. web-apps, microservices, SaaS providers, etc.).
To view more information about each component:
- Click the "Select tool" in the top navigation
- Double clicking on a component to open the information side panel
By clicking on the pencil icon over the component icon, you can upload an new image or select one from our library.
In the component information side panel you will also find three tabs:
- About: edit the component name, type, description, color, tags and aliases
- Readme: write a readme using all the blocks available in notebooks
- Releases: automatic list of releases when you connect your Git repos
ℹ️ Please note that this is the same information that would appear when reviewing component information in the system table view, and any changes to will automatically propage to there too.
Add components
There are two ways to add a new component while viewing the system map:
- Click the “+” plus icon in the system map top navigation bar
- Click one of the “→” arrow icons that appear on hover over a component in the map
In the pop up modal:
- Any components not currently present in your system map will appear by default. You can review all components automatically detected by Multiplayer by switching to "Show: All"
- After selecting a component, click "Add to the system map"
- If you want to manually add a component, click "Create new component"
- After naming your component and selecting a "type", click "Create component"
Add / delete dependecies
A dependecy (or a line / arrow between components) indicates a relationship where one component relies on another for functionality, data, or services to perform its role within the system.
Dependencies are automatically visualized by Multiplayer based on your live system data. Any new components added will also automatically present a dependency if Multiplayer has detected it.
If want to manually add a dependency:
- Hover over one side of the component until an “→” arrow icon appears
- Press, hold and drag the new dependecy to the desidered component
To delete a dependecy, select it, and hit delete on your keyboard.
Group components
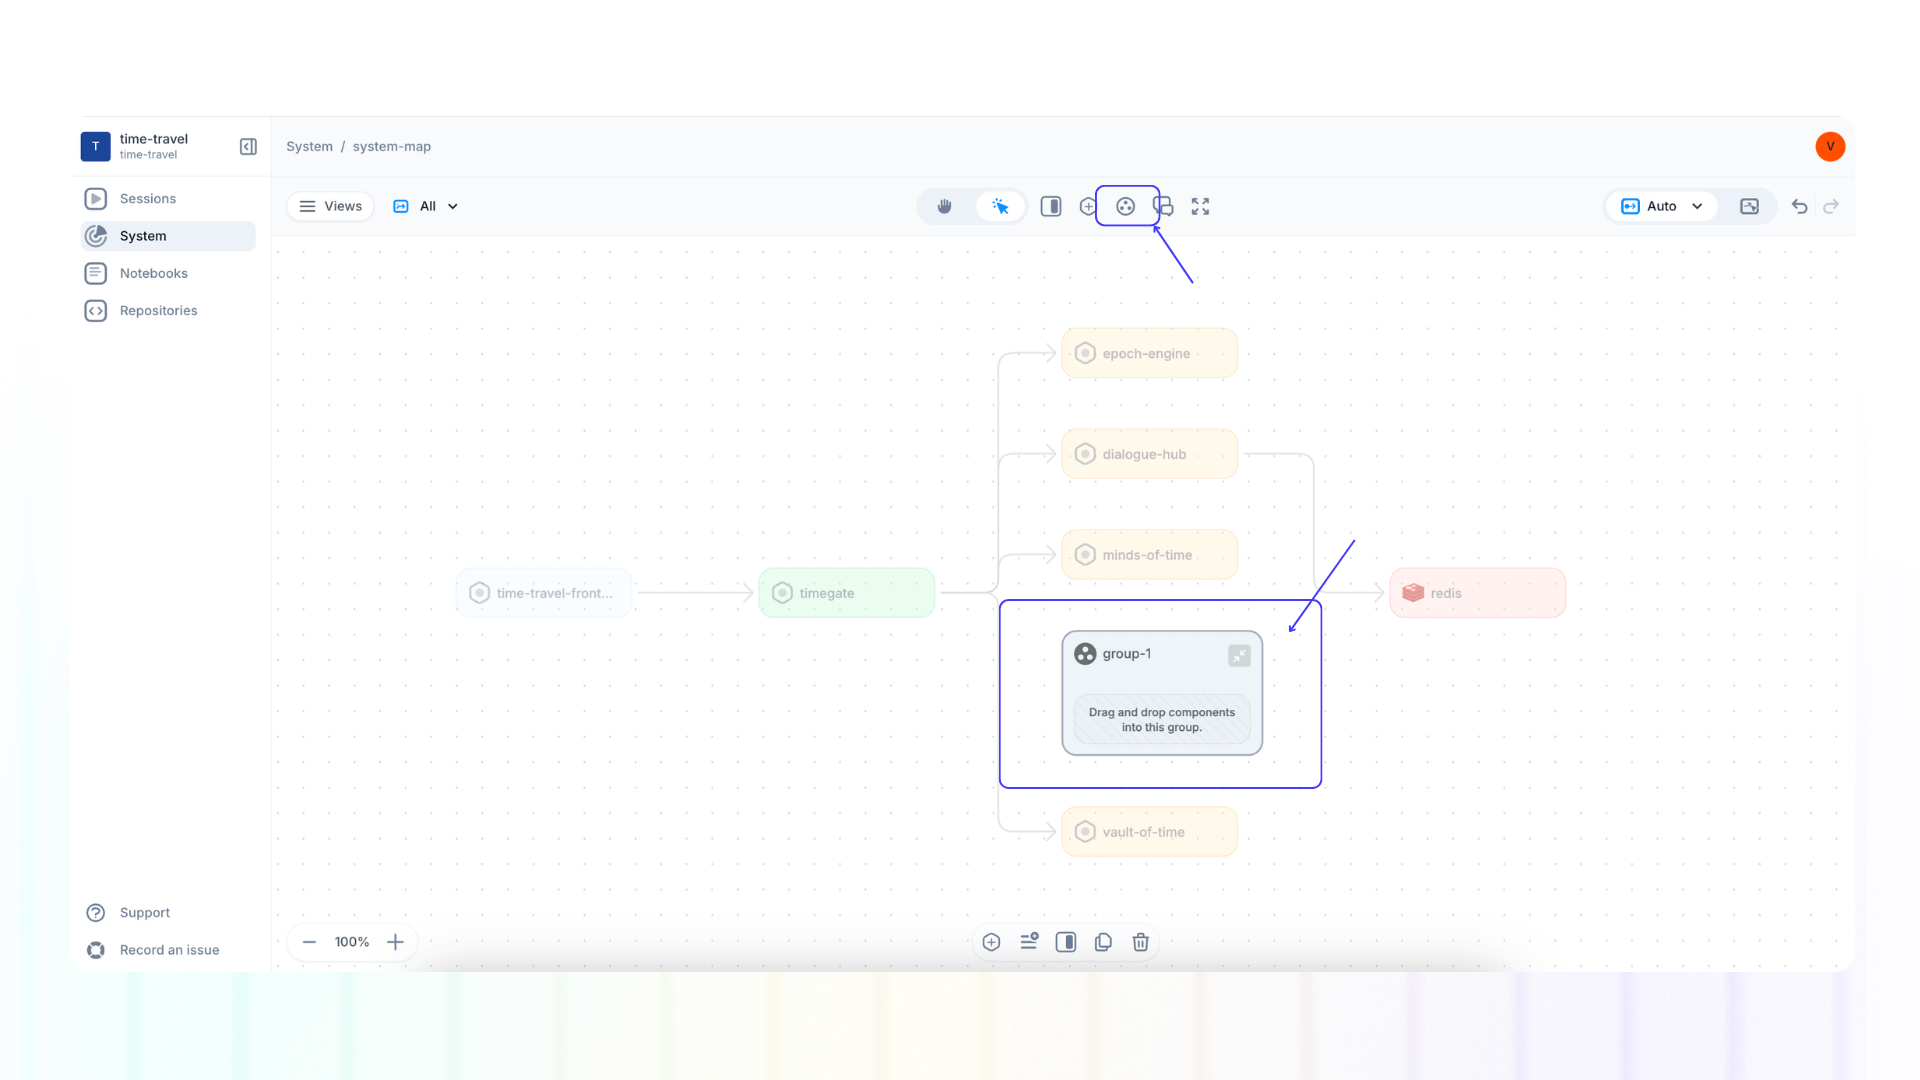
Groups are a visual aid for organizing components within a system map. Groups are purely for simplifying diagrams and do not reflect existing software structures (as are components and dependencies) or affect component dependencies.
Groups allow you to:
- Cluster related components together for cleaner, less cluttered architecture diagrams.
- Move grouped components as a unit for easier mapping of your system.
There are two ways to add a new group while viewing the system map:
- First create a group, by clicking the "add group" icon (circle with three dots) in the top navigation bar
- Once a group is created you can drag and drop components within a group
- First select all the components you want to add to a group, then click on the "add group" icon
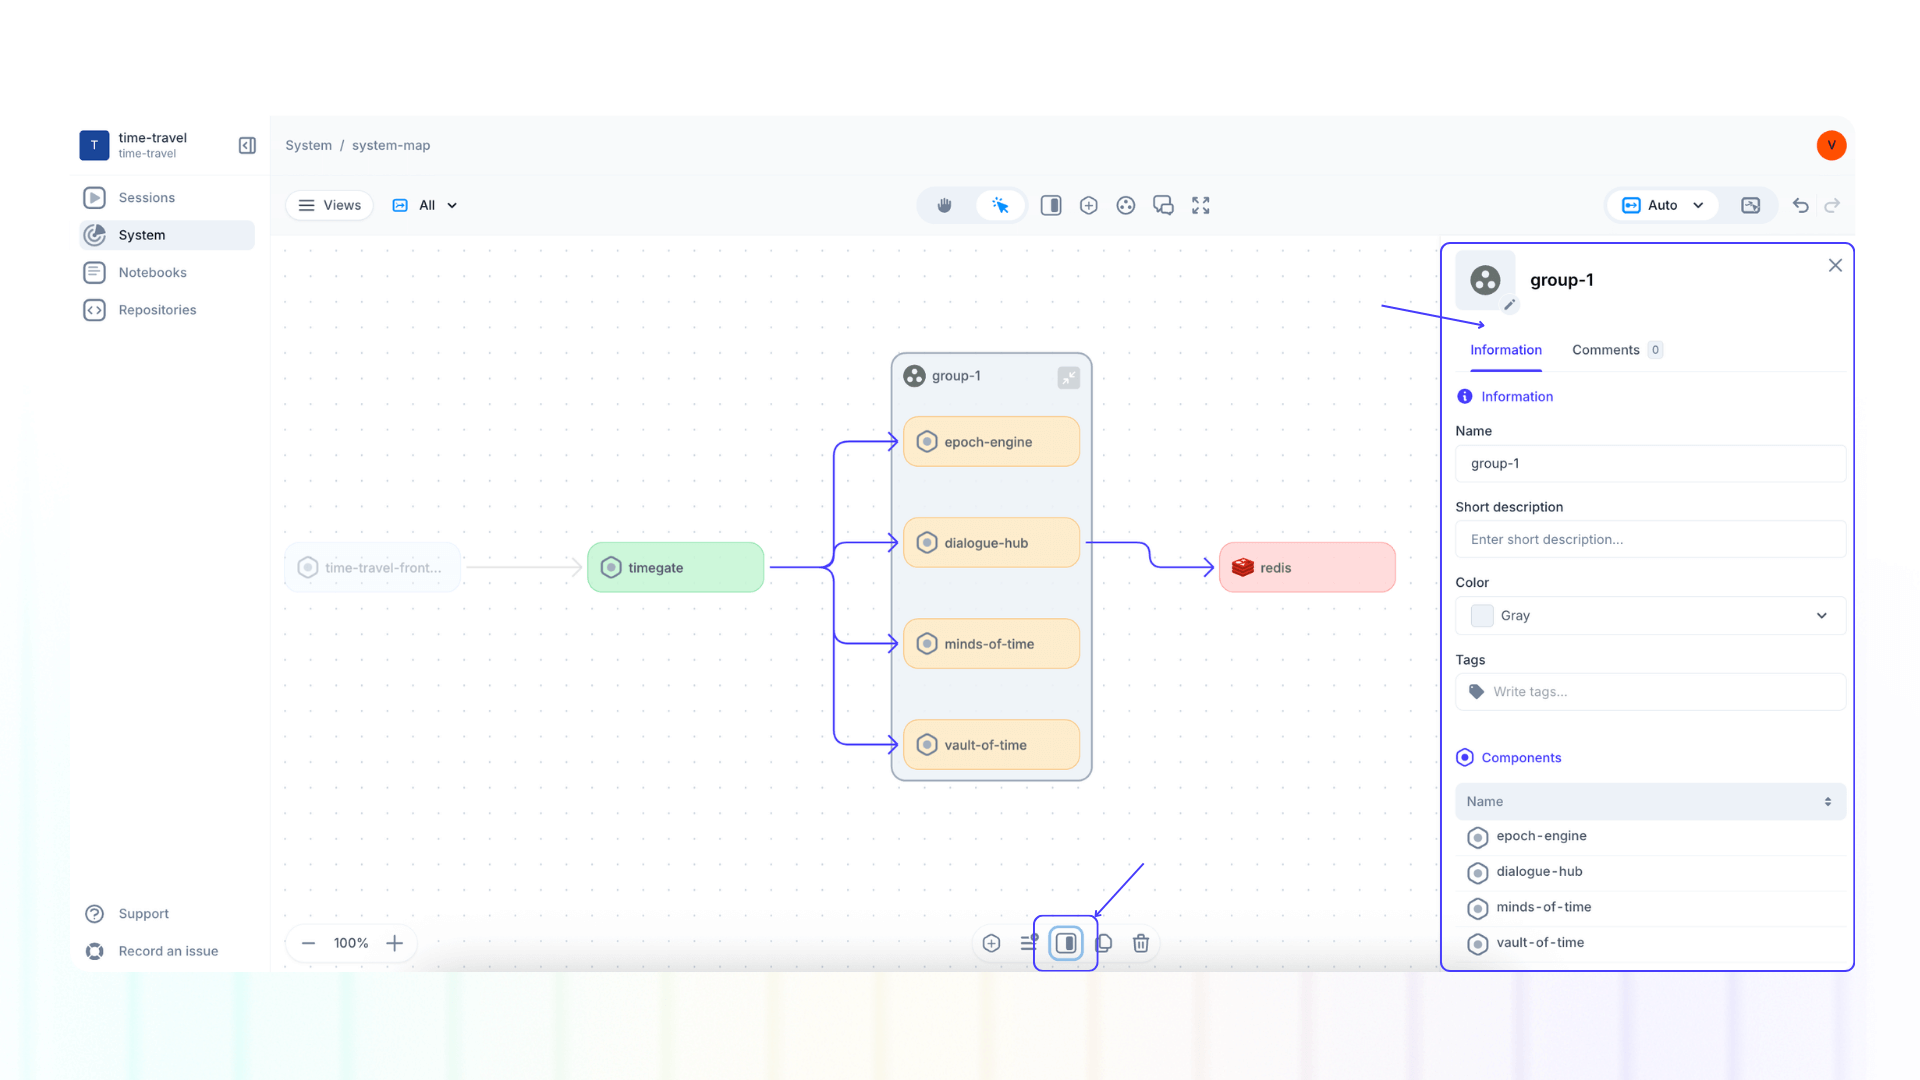
When selecting a component within a group, an additional menu appears at the bottom of the screen. Here you can:
- Add more components to the group
- Create a new view
- Remove components from the group
- Show the component details (side panel)
- Copy the component
- Delete the component
When selecting the group itself, an additional menu appears at the bottom of the screen. Here you can:
- Add more components to the group
- Create a new view
- Show the group details (side panel)
- Copy the group
- Delete the group
Delete components
There are two options to delete a component:
- Click the "Select tool"
- Select the component and hit delete on your keyboard
- Select the component and hit the "🗑" wastebin icon in the bottom menu
Auto layout vs manual layout
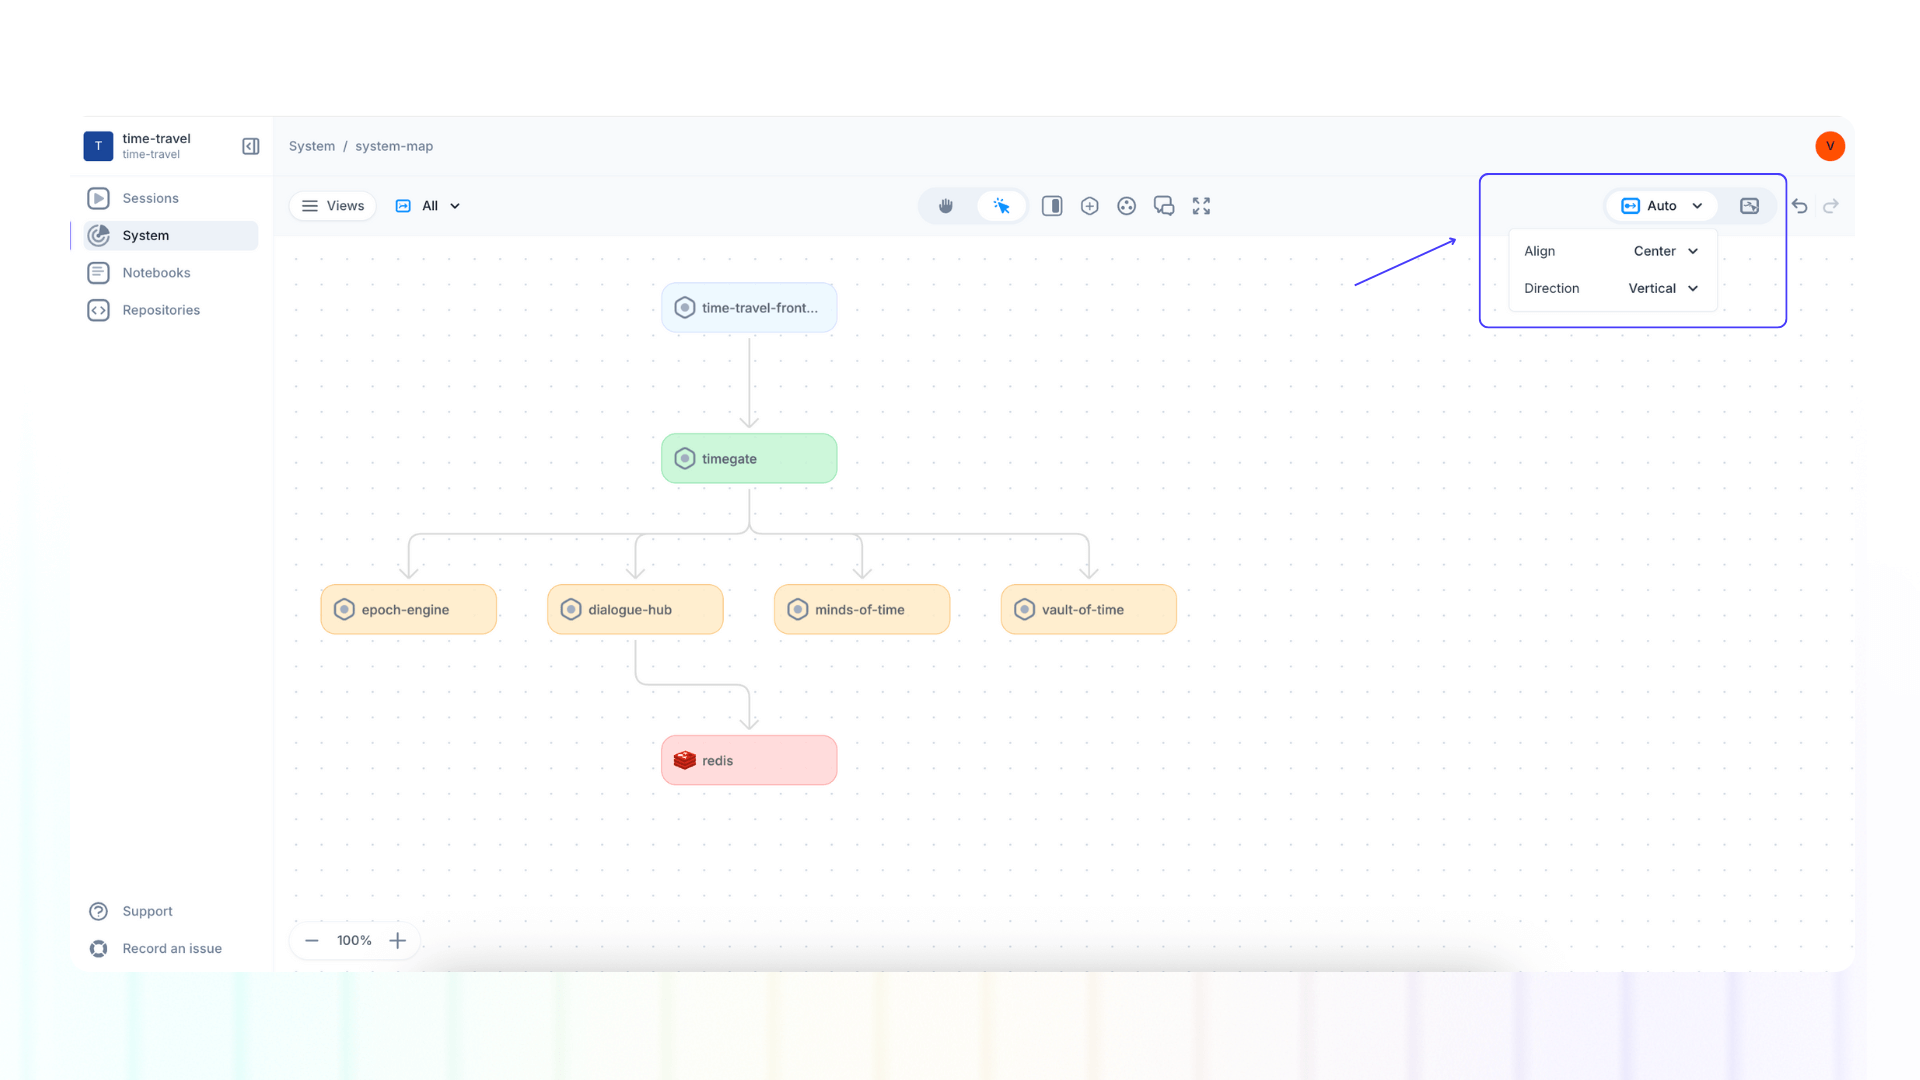
In the top navigation bar, on the right side, you can select the layout of your system map. This will arrange your components in the way that best suits your workflow:
- Auto layout: This is selected by default and it will automatically organize and align components and dependecies for you.
- Manual layout: Drag and drop components to your preferred placement within the canvas (ensure that "Select tool" is enabled)
With both options you don’t have to worry about reconnecting components when you move them within your map, all dependencies will remain intact.
To further customize your layout, for both options you can select:
- Align: Cernter or Start
- Direction: Horizontal or Vertical
Create and edit views
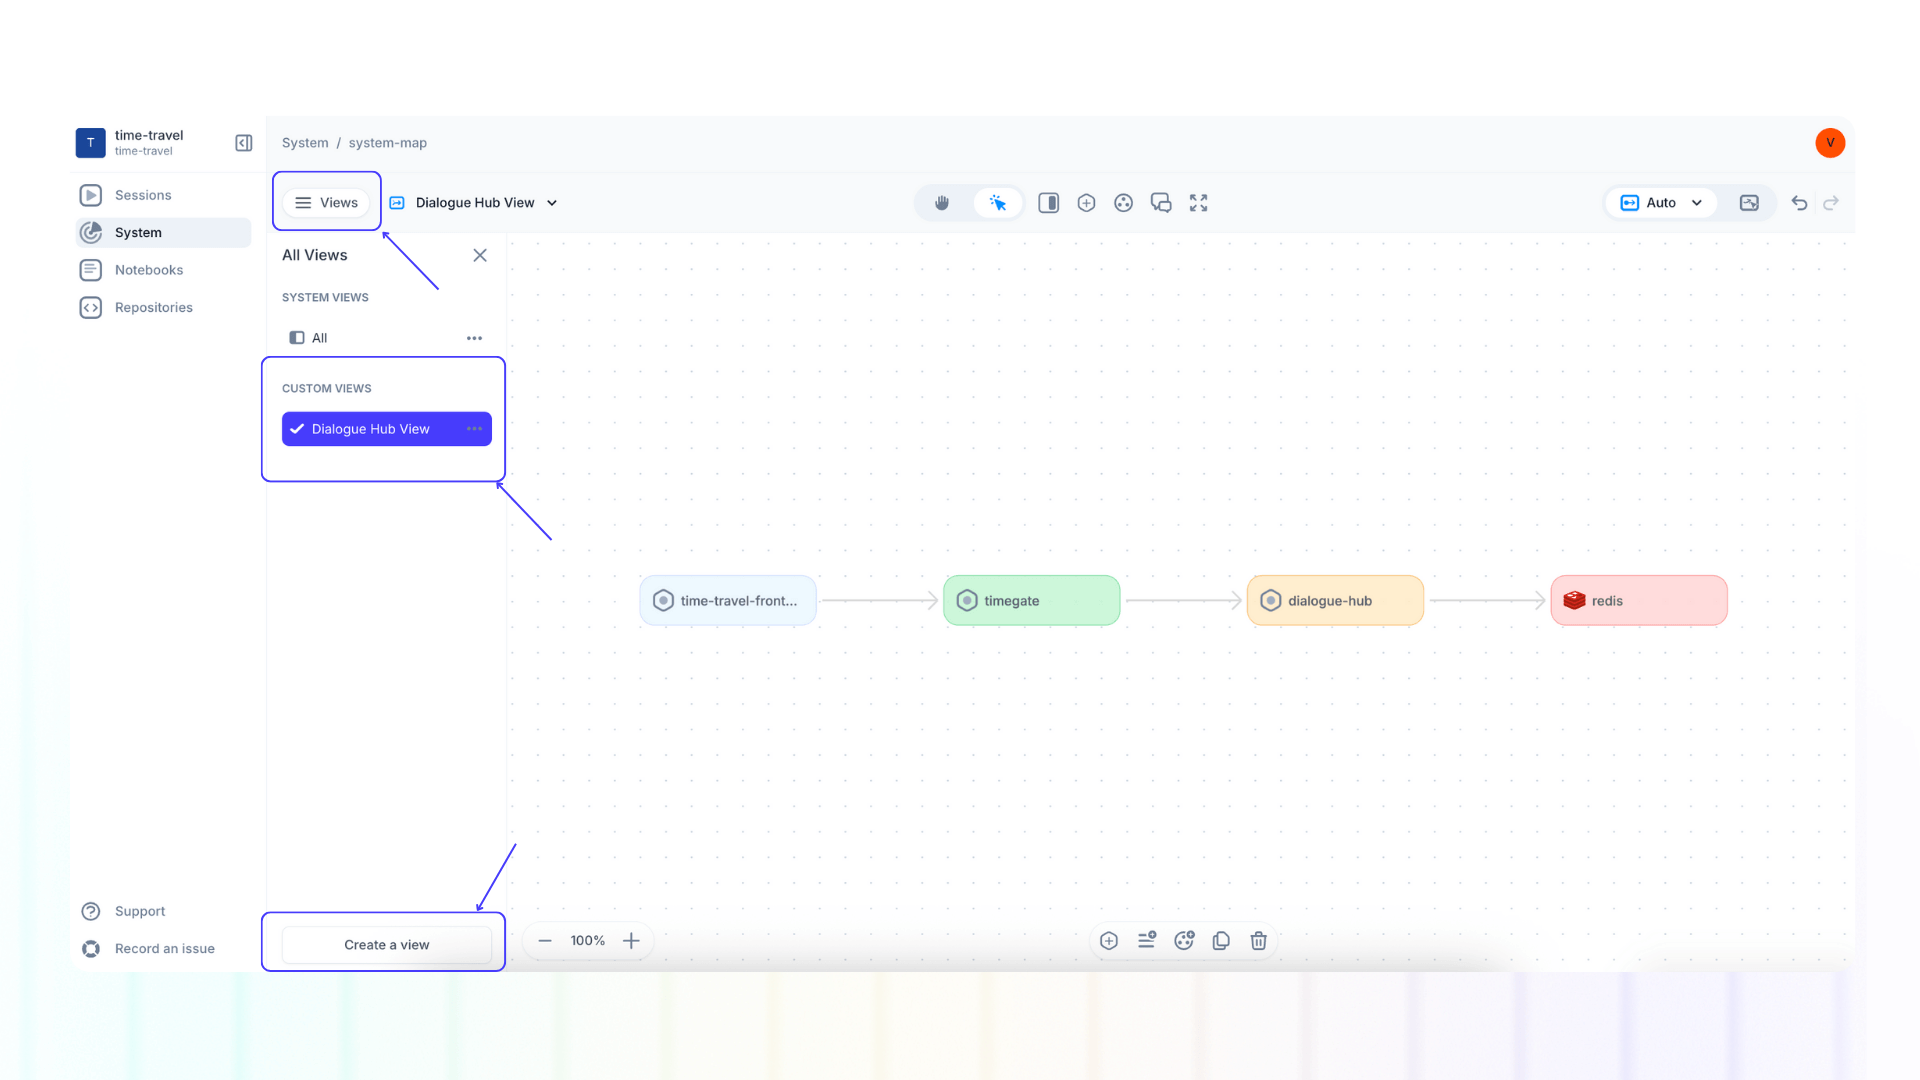
Views are a quick and intuitive way of understanding specific aspects of your system map or filtering for a particular functionality within your system.
You can also tailor views to specific teams or stakeholders (e.g. support engineerings, developers, architects, DevOps, QA, business leaders, etc.).
Create a view
- Click on “Views”
- Select the components within the map that you want to showcase in your view (hold “command” to select multiple components or click on empty area and drag your mouse to select multiple items).
- Click “Create a view”
ℹ️ Please note that deleting a component from a view will only remove it from that view. It won't delete it from other views or from the system map itself. However, editing the component information within a view, will edit it for all other views and the entire Platform.
Rename, duplicate, and delete a view
- Click on “Views”
- Select your desired view and click on the ellipsis button “…”
- Select your desidered function.
ℹ️ Deleting a view (or components within a view) won't affect your overall system map.
Next steps
👀 If this is the first time you’ve heard about us, you may want to see full stack session recordings in action. You can do that in our free sandbox: sandbox.multiplayer.app
🚀 If you’re ready to trial Multiplayer with your own app, you can follow the Multiplayer configuration steps. You can start a free plan at any time: go.multiplayer.app
📌 If you have any questions shoot us an email! 💜