Getting Started
📌 If you have any questions shoot us an email or join us on Discord! 💜
Sick of grepping through log files, hot-potato hand offs, and relying on multiple tools? Get started with Multiplayer in just a few simple steps. You'll be able to:
- Capture and share deep session replays that combine frontend screens with backend traces, logs, and metrics
- Use interactive notebooks to reproduce issues, test hypotheses, and hand off knowledge cleanly across teams and time zones
- Auto-document your architecture in real-time and gain full insight into your running system
Step-by-Step Guide
(1) Sign up
Visit go.multiplayer.app to sign up using Google, GitHub, GitLab, or your preferred email address. If you run into any issues, check our troubleshooting steps.
🔑 Pro Tip: Once signed up, your workspace, project, and example content (Platform, Notebook, and Sketch) are automatically created.
(2) Auto-Document Your System
Navigate to the System Dashboard and configure OpenTelemetry to automatically map your system architecture. Multiplayer will auto-discover and document:
- Components
- APIs
- Dependencies
- Platforms
- Environments
🔑 Pro Tip: Automatically create architecture diagrams and ensure your team always has up-to-date architecture info, without manual effort.
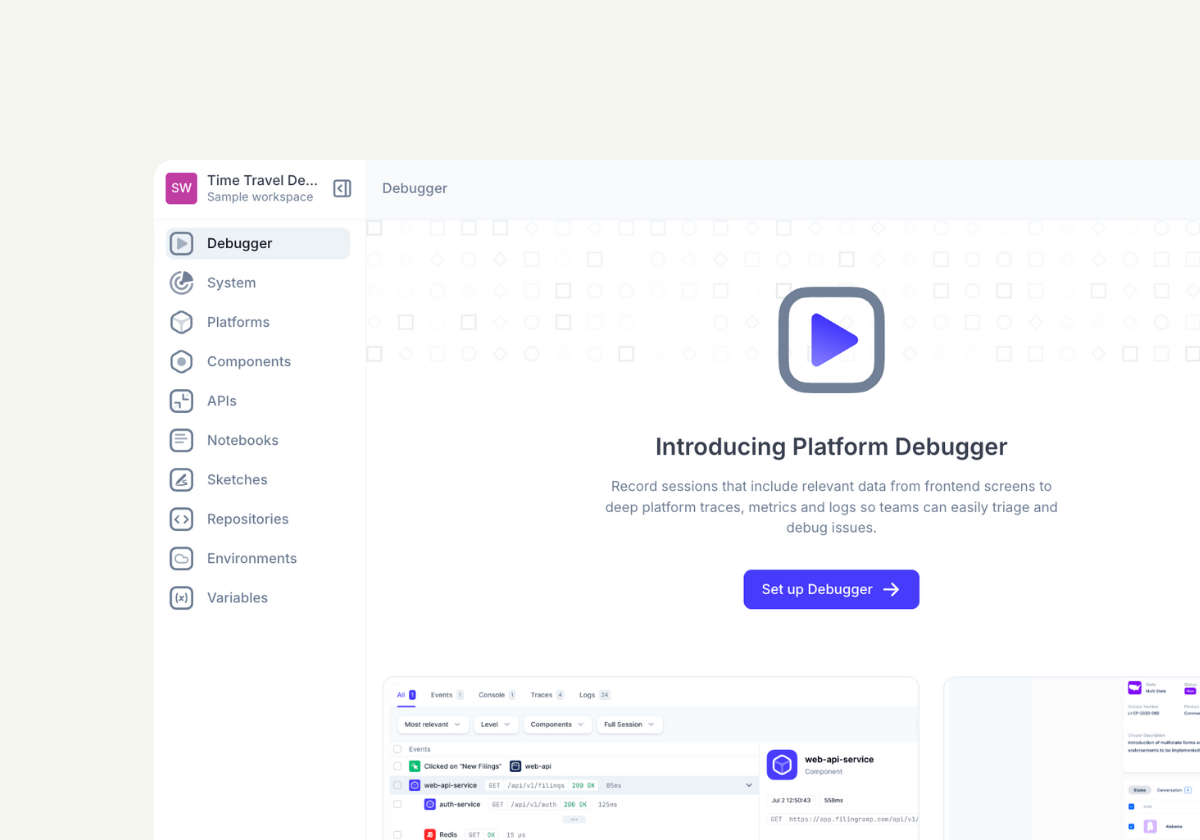
(3) Capture Your First Deep Session Replay
Install the Multiplayer debugger browser extension to start recording deep session replays.
Each replay captures everything you need to understand distributed system bugs: from frontend screens, backend traces, metrics, logs and full request/response content and headers.
🔑 Pro tip: The Platform Debugger also leverages OpenTelemetry - once you configure the integration, you can use it for both the debugger and the System Dashboard. Instead of using the browser extension, you also have the options of incorporating the web library into your application (and enabling the widget) in order to start recording debug sessions - this is included in the OpenTelementry set up.
(4) Start Designing, Testing, and Documenting your APIs
Explore Platform Notebooks to collaboratively design, test, document, and debug your integrations.
🔑 Pro Tip: You can create a Notebook from a debugging session. This auto-generates a runnable test scripts, complete with real API calls, payloads, and code logic—that mirrors the failure path.
(4) Invite Your Team
Bring your team on board for real-time collaboration in designing, developing and managing your system information and architecture.
Key Concepts
Familiarize yourself with these key Multiplayer terms:
- Workspace: This space will be the hub for your projects and teams. Click on the Multiplayer icon in the top left corner to open it.
- Project: A project corresponds to a specific application or system. You can have multiple projects within a single workspace, click on the Multiplayer icon in the top left corner to view your projects dashboard.
- Platform: A platform is a collection of components — i.e. software that uses or provides an API such as web apps, microservices, SaaS providers, etc.
- Team: You can create a shared team for all the stakeholders involved in designing and managing a distributed system, or create individual teams to reflect your org structure — e.g. Backend, Frontend, QA, DevOps, PMs, etc. You can have multiple teams within a single workspace.
Next Steps
If you have any questions shoot us an email or join us on Discord!
You can also check out:
If you’re interested in a particular feature send us a note - this will help us prioritize what you need the most!